These Dried Cherries are made using the dehydrator method which results in fruits that are pleasingly chewy with intense flavor. They are excellent in pasta and vegetable dishes, salads, baked goods, desserts, granola, on a cheese tray, for snacking out of hand, and more.
Preparing the cherries
Start with cherries that taste amazing; if the cherries aren’t delicious when fresh, they won’t be delicious when dried. When shopping for cherries, select fruit that is firm and glossy with green stems.
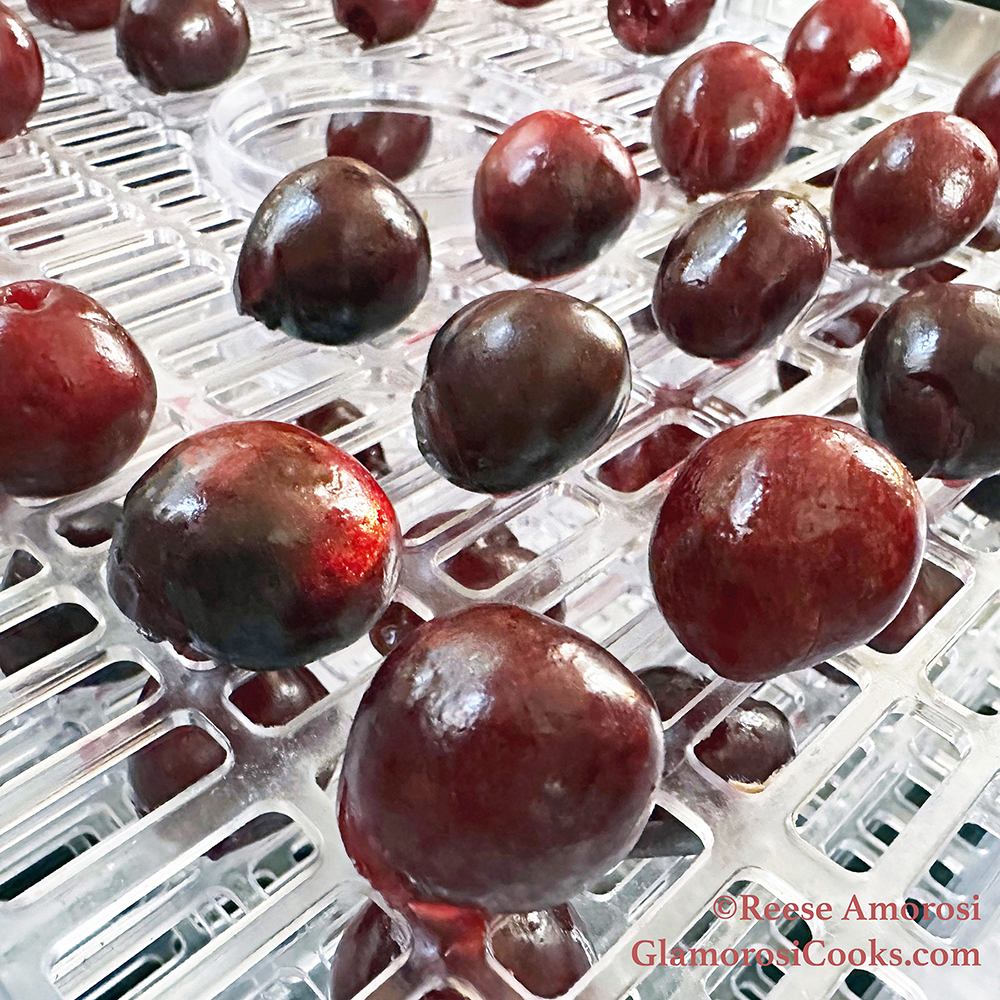
Prepare the cherries by washing, stemming and pitting them. I use an OXO Good Grips Cherry and Olive pitter; it is fast, inexpensive (around $10), easy to find online and small to store. When you’re done, count your cherries and count your pits, and then make sure the numbers match. This easy, extra step prevents dental disasters.
Dehydrating the cherries
When Covid-19 hit in 2020, one of my first moves was to buy a food dehydrator. At the time I wasn’t sure about the ongoing availability of store-bought produce (or the stability of the food supply chain in general), so I wanted our pantry as full as possible. Dehydrating food gave me something proactive to do during lockdown, and it’s a practice I’ve continued post-pandemic; it has joined canning as part of my food preservation routine. But, it’s not all about stockpiling. Dried fruits and vegetables are delicious, and there are quite a few we enjoy using immediately, including these cherries.
To make these Dried Cherries I use a dehydrator that has a limited selection of pre-set temperatures. They seemed random and odd to me at first, but I got used to them and they work. For this recipe I start at 154 for the first 10 hours, then reduce to 131 for around 7 hours. Set your dehydrator to similar temperatures to make this recipe. As always with dehydrating, there are variables that affect the actual drying time: the amount of water in the fruit, the temperatures and humidity in your area, etc. Practice makes perfect! Get to know your machine and you will be able to accurately adjust no matter what food you are dehydrating.
To ensure good air circulation, leave ample space between cherries. For even drying, pause the dehydrator every few hours and rotate the trays. It’s also a good idea to lift each cherry up with tongs to keep them from adhering to the tray.
I prefer my dried cherries whole, but some people like them cut. Halved cherries should be arranged on the drying trays with the cut side up to minimize sticking. Cut cherries usually require less time in the dehydrator.
Conditioning the cherries
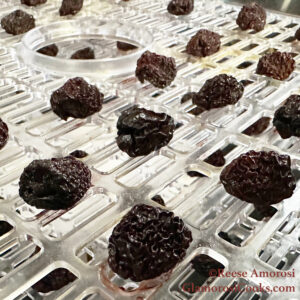 As they dry, the cherries will wrinkle and shrink and eventually resemble large raisins. When done they should be pliable and slightly tacky, but not wet. Allow the dried cherries to “rest” in the dehydrator for an hour or so, then once they’re cool move them to glass jars (I use pints). For easy clean up, soak the dehydrator trays right away once the cherries are removed.
If you’re eating the dried cherries right away, at this point they are ready to go. BUT, if you’re planning to store them, you will need to “condition” the cherries. Place them in jars filled only halfway and shake them several times a day. If condensation forms on the glass, the cherries aren’t dry enough and should be placed back in the dehydrator for an hour or more. Repeat this process daily until no more condensation appears, and then the jars can be fully filled and stored. If the conditioning step is skipped and the cherries aren’t dry enough to store long-term, they will likely mold and be unsafe to eat. All dehydrated foods should be conditioned to boost their safety and quality.
Storing Dried Cherries
Dried Cherries should be stored in air-tight containers in a cool, dry location away from light. They can keep for 6-12 months, but there are variables including the pantry temperature, your area’s climate, etc. Monitor all of your dehydrated foods and immediately discard any that look moldy, discolored, etc.
*************
If you enjoyed this recipe, you may also like these recipes for Cherry Chutney and Bourbon Soaked Cherries.
For more dehydrator recipes check out this Banana Jerky and these Dried Strawberries.

| Prep Time | 10 minutes |
| Cook Time | 17 hours |
| Passive Time | 1 hour |
| Servings |
|
|
|
- Arrange whole, pitted cherries on dehydrator tray, leaving room between each for good air circulation.
- Dehydrate at 154 degrees (or similar temperature for your dehydrator model) for 10 hours. Stop the machine every few hours to rotate your trays for even drying. As the cherries dry they will start to wrinkle and shrink.
- Reduce heat to 131 (or similar temperature for your dehydrator model) and dry for approximately 7 hours more, once again rotating the trays every few hours.
- Once the cherries are done drying, leave them in the dehydrator to rest before moving them to a glass jar.
- Serve within a day or so, or condition the cherries for long-term pantry storage.
